The Canon AE-1 manual is essential for mastering this iconic camera, offering detailed guidance on its operation, features, and troubleshooting. It covers automatic exposure modes, lens compatibility, and advanced techniques, ensuring optimal use of the camera’s capabilities. The manual is available as a downloadable PDF, providing easy access to comprehensive instructions.
1.1 Overview of the Canon AE-1 Camera
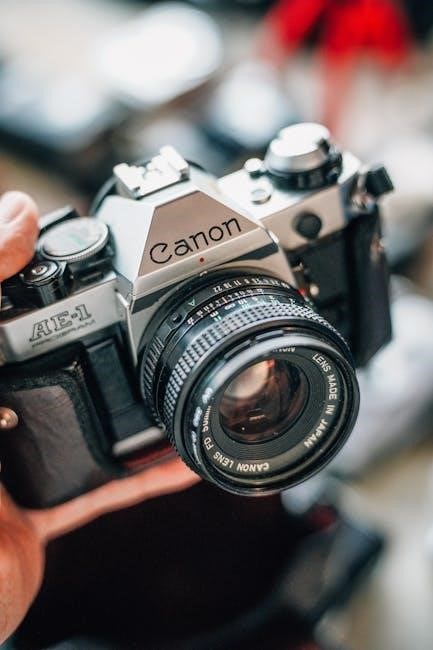
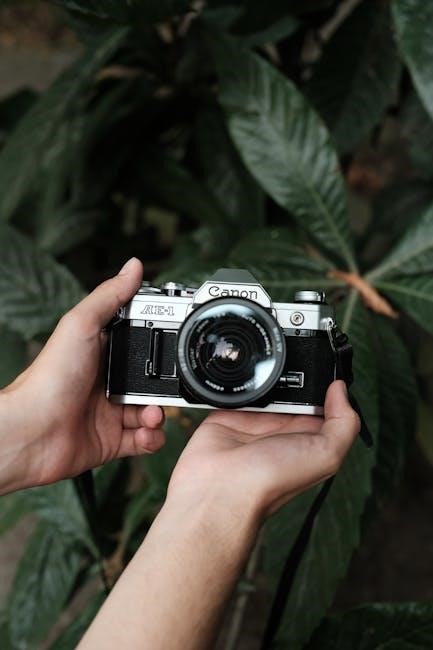
The Canon AE-1 is a legendary 35mm SLR film camera known for its durability, ergonomic design, and advanced features. Introduced in 1976, it offers automatic exposure modes, manual override, and compatibility with Canon FD lenses. Its intuitive controls and robust build made it a favorite among professionals and hobbyists. The AE-1’s adaptability to various shooting conditions and accessories ensures versatility for diverse photographic needs.
The manual is crucial for unlocking the Canon AE-1’s full potential. It provides step-by-step guidance on operating modes, lens compatibility, and troubleshooting. Understanding the manual ensures precise control over exposure settings, film handling, and accessory usage. It helps users avoid common errors and optimize the camera’s performance, making it an indispensable resource for both beginners and experienced photographers to achieve professional-quality results.
Key Features of the Canon AE-1
1.2 Importance of the Manual for Optimal Camera Use
The Canon AE-1 manual is vital for understanding and maximizing the camera’s features. It provides detailed instructions on operating modes, lens compatibility, and troubleshooting, ensuring users can harness the camera’s full potential. The manual helps photographers avoid common mistakes, optimize settings, and achieve professional results, making it an essential resource for mastering the AE-1’s capabilities.
2.1 Automatic Exposure (AE) Modes
The Canon AE-1 offers three automatic exposure modes: Programmed AE, Shutter-Speed Priority AE, and AE Flash. These modes allow photographers to achieve balanced exposures with minimal effort. Programmed AE automatically selects aperture and shutter speed, while Shutter-Speed Priority lets users set the shutter speed for creative control. Manual override is also available for precise adjustments, ensuring flexibility in various lighting conditions.
2.2 Compatibility with Canon FD Lenses
The Canon AE-1 is designed to work seamlessly with Canon FD lenses, ensuring optimal performance and automatic exposure functionality. FD lenses feature a built-in aperture control system, enabling precise metering and automatic operations. While non-FD lenses can be used, they require manual stop-down metering, limiting the camera’s automatic capabilities. This compatibility ensures photographers can fully utilize the AE-1’s advanced features for superior image quality.
2.3 Programmed AE, Shutter-Speed Priority, and Manual Override
The Canon AE-1 offers three exposure modes: Programmed AE, Shutter-Speed Priority AE, and Manual Override. Programmed AE provides automatic settings for aperture and shutter speed, while Shutter-Speed Priority allows manual control over shutter speed with automatic aperture adjustment. Manual Override enables full creative control, letting photographers adjust both aperture and shutter speed for precise results. These modes cater to both novice and advanced photographers, offering flexibility and creative freedom.

Camera Controls and Functions
The Canon AE-1 features intuitive controls, including a mode dial, aperture ring, and shutter speed dial, allowing precise adjustments for exposure settings and operation. The film advance lever and shutter button provide seamless functionality, ensuring smooth operation during shooting sessions.
3.1 External Controls: Dials, Buttons, and Levers
The Canon AE-1’s external controls include the mode dial, aperture ring, and shutter speed dial, allowing precise adjustments. The film advance lever and shutter button provide smooth operation. Additional features like the battery compartment latch and lens mount ensure functionality. These controls are designed for ease of use, enabling photographers to focus on capturing high-quality images efficiently. The camera’s ergonomic design enhances user experience.
3.2 Internal Mechanisms: Film Advance and Shutter System
The Canon AE-1’s internal mechanisms feature a robust film advance system, ensuring smooth film loading and advancement. The shutter system operates with precision, offering speeds from 1/1000 to 30 seconds. These mechanisms work together seamlessly to deliver consistent and reliable performance, making the AE-1 a trusted tool for photographers. The camera’s internal design supports its durability and functionality. Proper maintenance ensures optimal operation.
Loading and Preparing the Camera
Mount the lens by aligning the red positioning point with the camera’s red dot. Set the film speed and load the film into the camera, ensuring proper alignment for smooth operation. Follow the manual’s instructions carefully to prepare the camera for shooting.
4.1 Mounting the Lens
To mount the lens, align the red positioning point on the lens with the red dot above the camera mount. Turn the lens clockwise until it clicks securely into place. Ensure the lens is properly seated to avoid damage or misalignment. This step is crucial for maintaining optical quality and ensuring the camera functions correctly. Always handle the lens with care to prevent scratches or damage.
4.2 Setting the Film Speed
Set the film speed by pushing the film advance lever to its stand-off position. Locate the film speed dial on the camera’s top plate and align it with the ISO rating of your film. Ensure the dial clicks into place for accurate exposure settings. Proper film speed alignment is crucial for achieving correct exposures and optimal image quality with the Canon AE-1.
4.3 Loading Film into the Camera
Open the camera back by pulling the film rewind knob. Align the film leader with the spool’s slot, ensuring it fits securely. Advance the film by turning the advance lever until it stops. Close the camera back and verify the film counter advances correctly; This process ensures proper film loading for accurate exposure and seamless shooting with the Canon AE-1.

Shooting Modes and Exposure Control
The Canon AE-1 offers Programmed AE, Shutter-Speed Priority, and Manual Override modes, providing flexibility for various lighting conditions and creative control over exposures.
5.1 Programmed AE Mode
Programmed AE mode automatically selects both aperture and shutter speed for optimal exposure, offering ease of use while maintaining creative control. It is ideal for beginners and professionals alike, providing balanced results in various lighting conditions. This mode allows for manual override when needed, ensuring flexibility and precision in capturing desired images.
5.2 Shutter-Speed Priority AE Mode
Shutter-Speed Priority AE Mode allows users to manually set the shutter speed, with the camera automatically adjusting the aperture for proper exposure. This mode is ideal for managing motion effects, such as freezing action or creating blur. It suits various lighting conditions and offers creative control, making it versatile for photographers seeking to capture dynamic or artistic imagery with precision and ease.
5.3 Manual Override for Creative Control
Manual Override provides full creative control, allowing photographers to set both aperture and shutter speed independently. This mode is ideal for achieving specific artistic effects or handling challenging lighting conditions. By bypassing automatic settings, users can tailor exposures to their vision, enabling precise control over the image’s aesthetic and technical aspects for professional-level photography.
Using the Viewfinder and Focusing System
The Canon AE-1’s viewfinder provides a clear display with a metered area and dioptric adjustment for accurate composition. The focusing system includes a microprism and split-image screen for precise focus.
6.1 Understanding the Viewfinder Display
The Canon AE-1’s viewfinder features a bright, eye-level pentaprism display with 93.5% coverage. It includes a microprism spot meter and split-image rangefinder for precise focusing. The display shows aperture, shutter speed, and exposure information, aiding manual overrides. The dioptric adjustment ensures sharp viewing for users with glasses. This design enhances accuracy and simplifies framing, making it ideal for both novice and professional photographers.
6.2 Focusing Techniques for Sharp Images
Use the AE-1’s viewfinder features for precise focusing. Align the subject in the center using the microprism spot or split-image rangefinder. For sharp images, ensure the lens is properly seated and adjust focus gently. In low light, use the dioptric adjustment for clarity. Practice manual focusing to master control over depth of field and subject emphasis, enhancing your creative photography with the Canon AE-1.
Working with Canon FD Lenses
Canon FD lenses are essential for AE modes on the AE-1. They ensure compatibility and proper functionality. Non-FD lenses require manual adjustments for optimal performance as detailed in the manual.
7.1 Recommended FD Lenses for the AE-1
Canon FD lenses are designed to optimize the AE-1’s performance. Popular choices include the 50mm f/1.8, 35mm f/2, and 70-200mm f/4. These lenses ensure compatibility and deliver sharp, high-quality images, making them ideal for various photography styles. They are also easy to mount and use, as described in the manual, ensuring a seamless shooting experience with the AE-1 camera.
7.2 Using Non-FD Lenses with the AE-1
While the AE-1 is optimized for Canon FD lenses, non-FD lenses can be used with proper adjustments. Stop-down metering is required for accurate exposure, and manual override is possible. However, some automatic features may not function. The manual provides guidance on mounting and using non-FD lenses, ensuring compatibility and effective photography, though FD lenses remain the recommended choice for optimal performance.
Advanced Exposure Techniques
Advanced exposure techniques on the AE-1 involve precise control of aperture, shutter speed, and ISO. These settings allow photographers to achieve desired effects like depth of field and motion capture, enhancing creative control and image quality.
8.1 Aperture and Shutter Speed Settings
Aperture and shutter speed settings on the AE-1 offer precise control over exposure. Aperture regulates light entry, while shutter speed freezes or blurs motion. Together, they enable photographers to achieve desired effects, from shallow depth of field to creative motion capture. Understanding these settings is crucial for mastering manual overrides and enhancing image quality in various lighting conditions.
8.2 Using ISO Settings for Various Lighting Conditions
ISO settings on the AE-1 are critical for adapting to different lighting conditions. Lower ISOs (like 100 or 200) are ideal for bright settings, minimizing grain. Higher ISOs (400 or 800) suit low-light environments, ensuring properly exposed images. Adjusting the ISO allows photographers to balance noise and image quality effectively, optimizing results in diverse scenarios without compromising creative intent.

Flash Photography with the AE-1
The AE-1 supports flash photography with built-in flash and external units, ensuring balanced exposure in low-light conditions. The AE flash mode optimizes illumination for professional results, as detailed on page 44 of the manual.
9.1 Built-In Flash and External Flash Units
The Canon AE-1 features a built-in flash for convenient use in low-light conditions. Additionally, it supports external flash units, offering greater flexibility and power for professional photography. The manual details how to connect and use both options effectively, ensuring optimal flash performance and balanced exposure in various lighting scenarios. Pages 44 and 57 provide specific instructions for setup and operation.
9.2 AE Flash Mode for Balanced Exposure
The AE Flash Mode on the Canon AE-1 ensures balanced exposure by automatically adjusting aperture and shutter speed when using the built-in or external flash. This mode minimizes overexposure in bright conditions and enhances low-light performance. The manual provides detailed steps on page 44 for enabling AE Flash Mode, allowing photographers to achieve professional results with ease and consistency.

Maintenance and Troubleshooting
Regular cleaning and proper care extend the Canon AE-1’s lifespan. The manual provides tips for resolving common issues and maintaining optimal performance, ensuring reliable operation.
10.1 Cleaning and Caring for the Camera
Regular cleaning ensures the Canon AE-1’s longevity. Use a soft cloth to wipe external surfaces and avoid harsh chemicals. For internal mechanisms like the mirror and viewfinder, a dry, lint-free cloth is recommended. Store the camera in a cool, dry place to prevent moisture damage. Proper care ensures optimal performance and maintains the camera’s reliability for years of use.
- Clean external surfaces with a soft cloth.
- Avoid harsh chemicals or abrasive materials.
- Store in a dry, cool environment.
10.2 Common Issues and Solutions
Regular maintenance and troubleshooting can resolve common issues with the Canon AE-1. Proper care helps prevent malfunctions and extends the camera’s lifespan. Addressing issues promptly ensures optimal performance and reliability for years of use.
- Jammed film advance: Check for loose film or debris.
- Inaccurate metering: Ensure batteries are fresh and functional.
- Faulty light meter: Clean or replace as needed.
Accessories for Enhanced Photography
Essential accessories like filters, external flash units, and lens cleaning tools enhance your Canon AE-1 experience, providing versatility and improving image quality in various shooting conditions.
11.1 Recommended Accessories for the AE-1
Essential accessories for the Canon AE-1 include a Canon Speedlite 199A flash unit for enhanced lighting control, high-quality FD lenses for versatility, and a sturdy camera strap for comfort. Additional recommended items are filters (UV, polarizing, and neutral density) to enhance image quality, a motor drive for faster film advancing, and a remote shutter release to minimize camera shake. These accessories expand the camera’s capabilities and improve your shooting experience.
11.2 Using Filters and Other Attachments
Filters and attachments enhance creativity and functionality with the Canon AE-1. UV filters protect the lens and reduce haze, while polarizing filters improve contrast and reduce glare. Neutral density filters control light for creative exposures. Additionally, optional attachments like lens hoods and remote shutter releases minimize camera shake and improve image quality. These tools expand the AE-1’s versatility, allowing photographers to achieve desired effects in various lighting conditions.
The Canon AE-1 manual provides comprehensive guidance, unlocking the camera’s full potential. Mastering its features ensures exceptional photography. Refer to the PDF manual for detailed instructions and troubleshooting. Happy shooting!
12.1 Summary of Key Features and Benefits
The Canon AE-1 manual highlights the camera’s automatic exposure modes, FD lens compatibility, and manual override for creative control. It also covers film loading, focusing techniques, and advanced exposure settings. The manual ensures optimal use of the camera’s features, providing detailed troubleshooting and maintenance tips. Available as a downloadable PDF, it serves as an indispensable guide for mastering the AE-1’s capabilities.
12.2 Final Tips for Mastering the Canon AE-1
To fully master the Canon AE-1, practice with different shooting modes and experiment with manual overrides. Regularly clean and maintain the camera to ensure optimal performance. Familiarize yourself with FD lenses and explore their creative potential. Troubleshoot common issues using the manual’s guidance, and leverage resources like the downloadable PDF for quick reference. Consistent practice will help you unlock the AE-1’s full photographic capabilities.
Leave a Reply
You must be logged in to post a comment.